💬 Steps to start sending SMS
Step 1. Raven Account Setup
If you have not signed up on Raven yet, please sign up for free. You can either use the default App (<your-account-name_test>) created on sign up or create a new one by going to the Settings tab in the dashboard. To know more please check our platform doc on Apps. Collect your credentials (API Key and App ID) as you will need them in the API to trigger notifications.If you are sending SMSs in India, TRAI has mandated to register your business,
headers (sender IDs), and templates on any of the DLT platforms. If you have
not done this already, you should check the guide on getting the DLT setup
done.
Step 2. Add an SMS Integration
An Integration is nothing but a provider like Twilio, MessageBird etc. You can add/remove any provider without having to manage their APIs. Head over to Integrations tab in the dashboard and select SMS. You will see a list of available SMS integrations as shown here: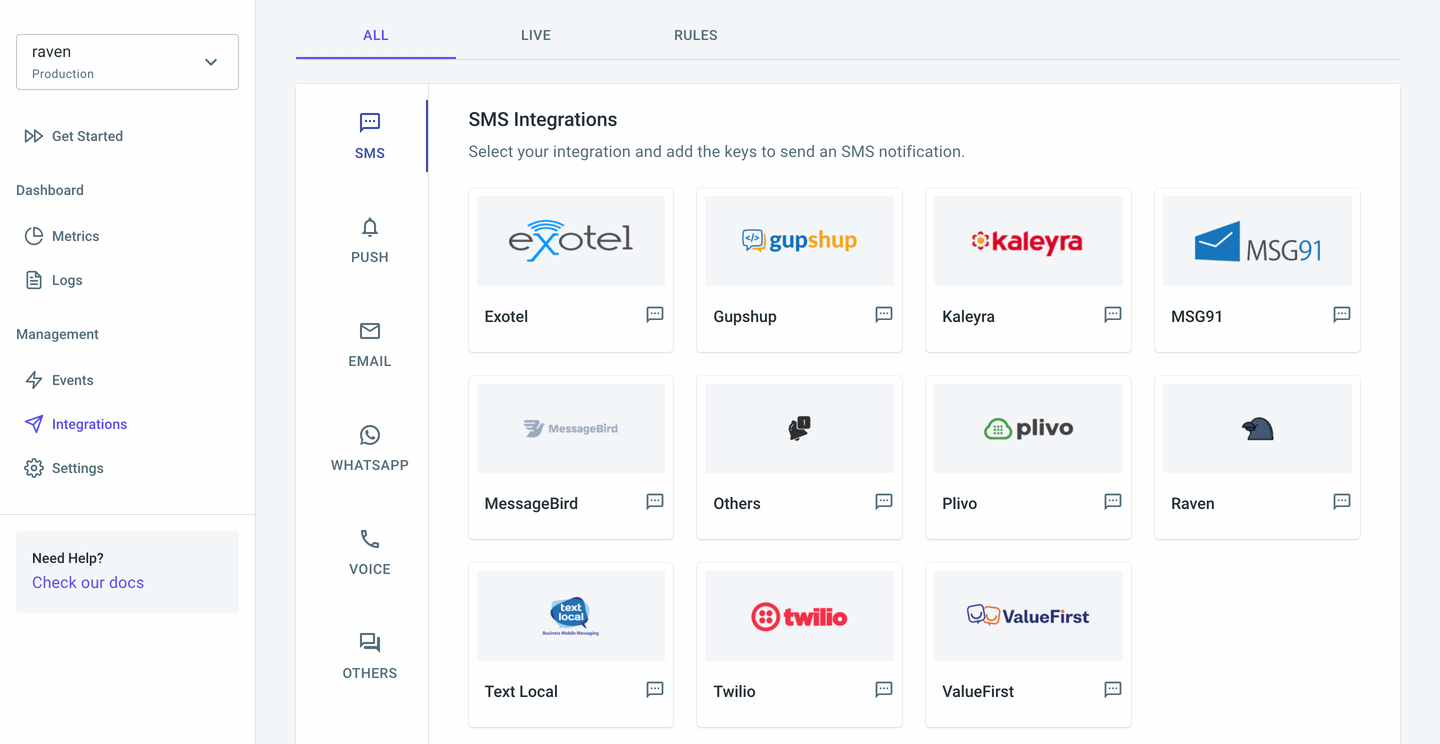
Step 3. Create an Event
Events define - which notifications to send, what should the content be and how to send them. You can manage all this directly from the dashboard without having to write a single line of code. Check our platform doc on Events for more details.
- Give a unique name to this event. This name will be used to trigger the event in the Send Event API.
- Select SMS as a channel to send notifications. Also, select the Integration that you added earlier in Step 2. If you are using multiple SMS Integrations, you can add one as a fallback. Select the “More Options” switch to add fallbacks.
- Create the SMS template. You can add dynamic text to the template like user
name, invoice number, order id etc., with the handlebar notation, like this
{{user_name}}For more details on SMS templates, encoding, languages etc, please check our SMS Template doc.
Step 4. Trigger the Event
Trigger the Event Now we just need to test if our setup works. Trigger the event that you created above. You can either do this from the dashboard itself (Go to Events tab > Click on View Event Button (Eye) > Dialog opens > Click on Test Event). The other way is to hit the API directly with cURL or Postman. Below is how the API will look like -
Copy the cURL request and simply hit enter in your terminal.
Great! You’ve successfully sent an SMS with Raven. 👍
Step 5. Verify in Logs
As a final step, we can verify if everything went well and the notification was sent. Raven provides a single view of all logs across all channels. You can view the request payload, the response and the status of the notification sent. You can check our platform doc on Logs & Metrics for more details. Head over to in the Logs tab dashboard and click on View icon of the first log entry. You will be able to see the details of the payload and the status of the notification that you sent.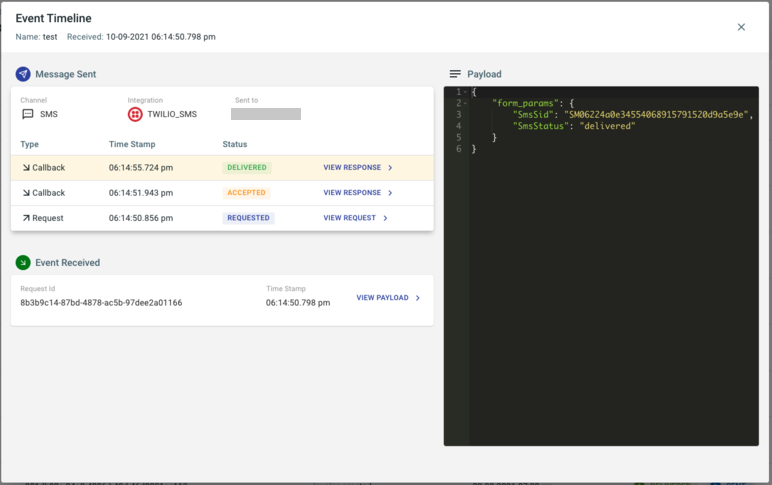
If you were able to successfully receive the SMS, you are all set! 👍 If you
are facing any issues, please email us on support@ravenapp.dev