> ## Documentation Index
> Fetch the complete documentation index at: https://docs.raven.dev/llms.txt
> Use this file to discover all available pages before exploring further.
# Events
> Events are triggers that define:
1. The channels on which notifications will be sent.
2. Content of the notifications.
3. Integrations/rules to be used to send a notification.
Notifications are sent by triggering an event to Raven using the
[Send Event API](/api-reference/send-event). When Raven receives an event, it
will use the configuration to send the notifications.
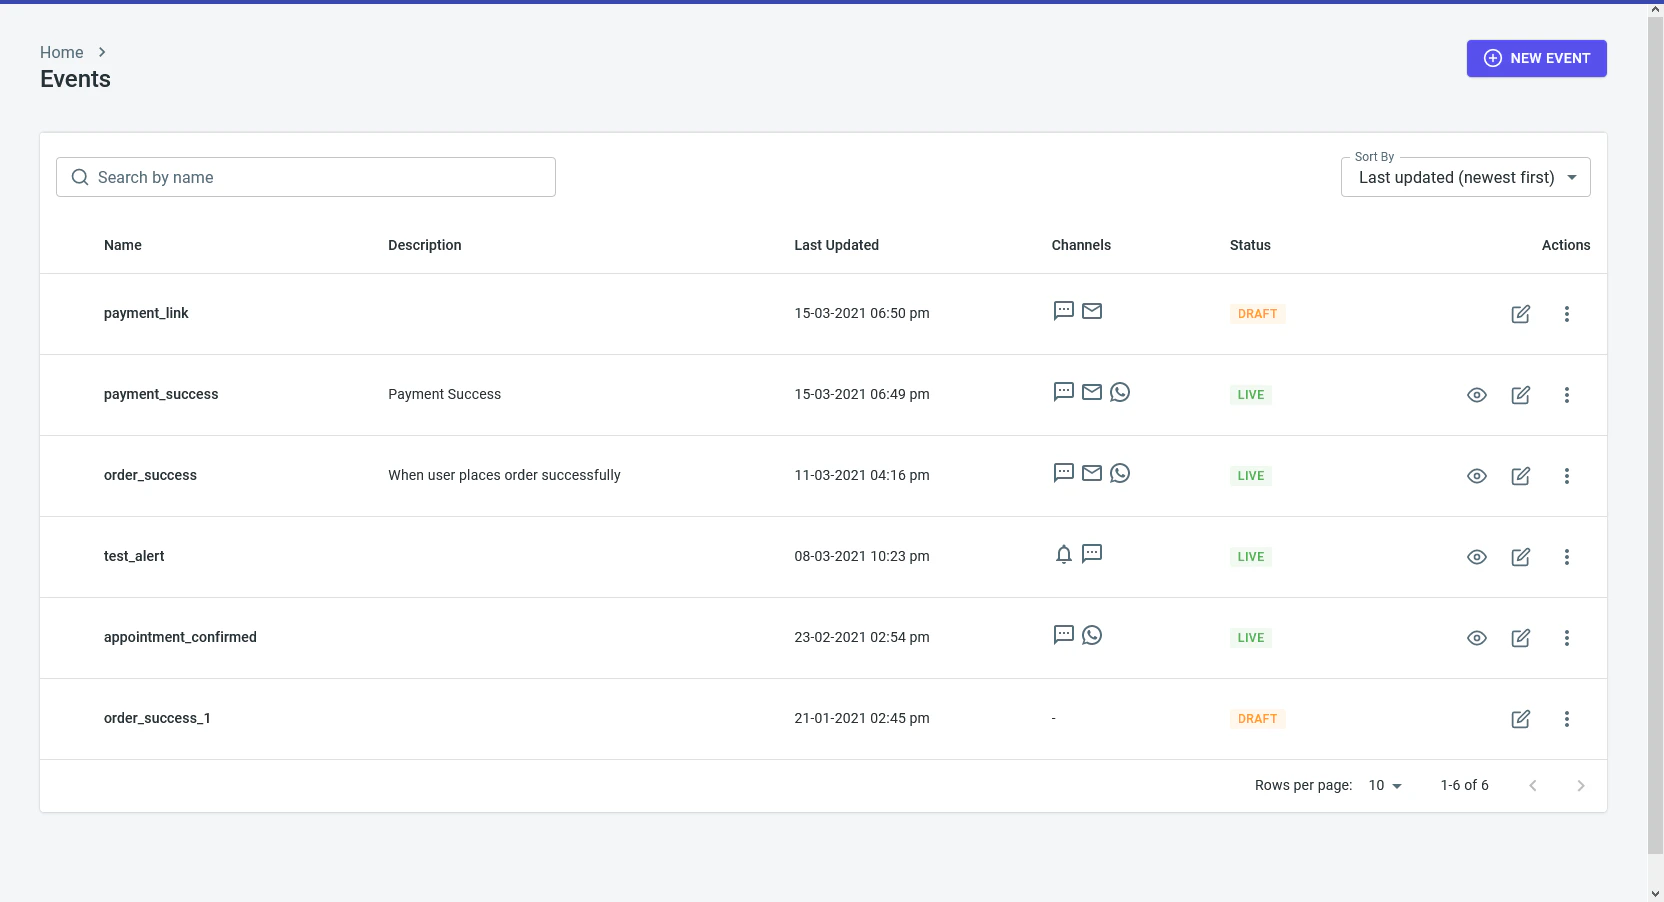
You can view all your events in the
[Events](https://console.ravenapp.dev/get-started) tab, as shown in the image
below. You can create a new event by using the New Event button.
 ## Creating a New Event
### Step 1. Event Name
An event has 3 parts - a name, channels & routing and templates. When you start
creating an event, it will be saved in a **`DRAFT`** state, until you finish
configuring all the parts.
### Step 2. Event Channels
Define the channels you want to send the notifications on. Suppose for example,
we want to send a login OTP (One time password) to our users. We configure this
in the following way:
## Creating a New Event
### Step 1. Event Name
An event has 3 parts - a name, channels & routing and templates. When you start
creating an event, it will be saved in a **`DRAFT`** state, until you finish
configuring all the parts.
### Step 2. Event Channels
Define the channels you want to send the notifications on. Suppose for example,
we want to send a login OTP (One time password) to our users. We configure this
in the following way:
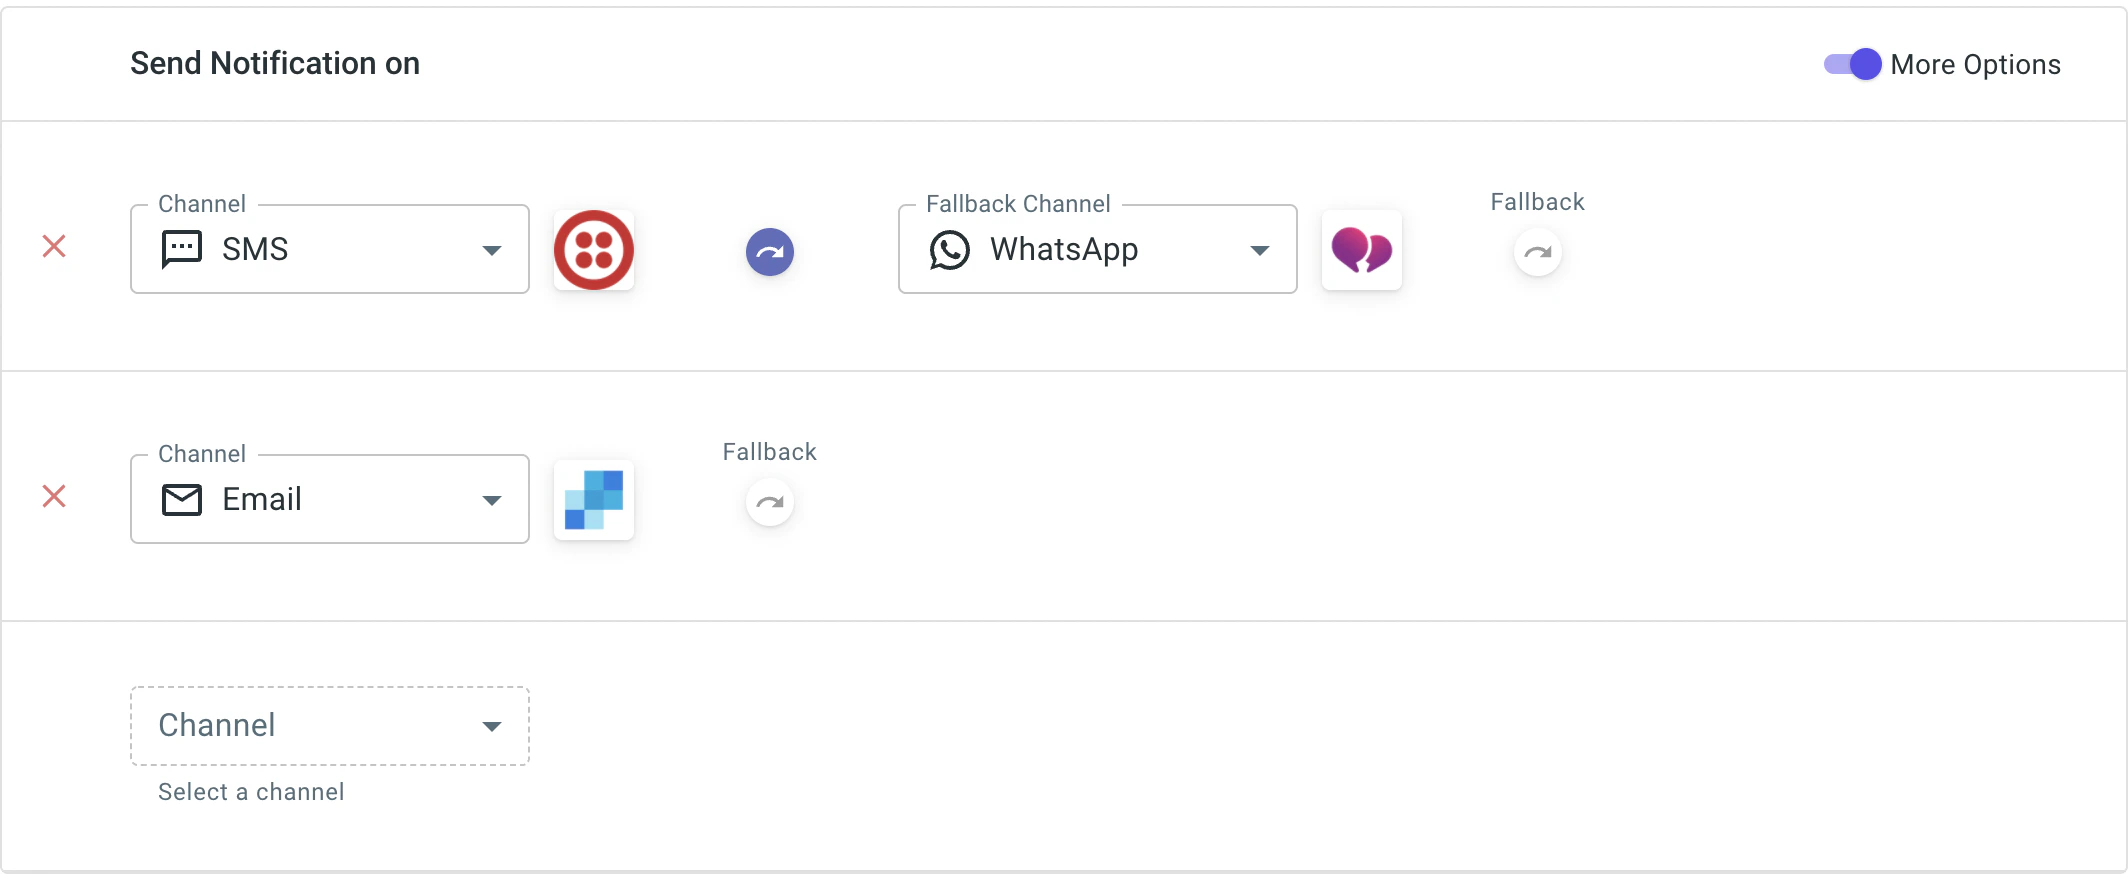 This says, Send OTP on SMS and Email first. Beside every channel we can select
the Integration or Rule with which it should be sent. Here, we have selected
Twilio for SMS and SendGrid for Email. Note that here we have also added
WhatsApp as a fallback channel to SMS. This means, if SMS fails to deliver for
some reason, try sending the OTP via WhatsApp. We cover more on adding channel
fallbacks in our [Channel Fallback](/platform/events/channel-fallback).
### Step 3. Event Templates
Once the channels are defined, the final step is to configure the notification
content for each channel. We have a channel wise doc on templates. Check them
out below 👇
* [SMS Template](/sms/sms-template)
* [Email Template](/email/email-template)
* [Push Template](/push/push-template)
* [WhatsApp Template](/whatsapp/whatsapp-template)
* [Voice Template](/voice/voice-template)
* [Slack Template](/chat/slack/slack-template)
**Dynamic Fields**
Our channel wise template docs above cover this in more detail. In brief, you
can pass dynamic or custom data in the templates like Invoice ID, user name,
tracking link etc by specifying them within handlebars `{{ user_name }}`. Raven
uses [Handlebars.js](https://handlebarsjs.com/guide/#what-is-handlebars) to
parse the template and all handlebar operations are supported like nested
objects, #if, #each etc. You will need to pass the value of the variables in the
`data` object of [Send Event API](/api-reference/send-event).
### Step 4. Test
Once everything is configured, its status is changed from DRAFT to LIVE. You can
now use the Send Event API to test, by sending an event with the configured
event name. You can also trigger the Event from the dashboard. Go to Event
List > Send Event (Airplane Icon).
This says, Send OTP on SMS and Email first. Beside every channel we can select
the Integration or Rule with which it should be sent. Here, we have selected
Twilio for SMS and SendGrid for Email. Note that here we have also added
WhatsApp as a fallback channel to SMS. This means, if SMS fails to deliver for
some reason, try sending the OTP via WhatsApp. We cover more on adding channel
fallbacks in our [Channel Fallback](/platform/events/channel-fallback).
### Step 3. Event Templates
Once the channels are defined, the final step is to configure the notification
content for each channel. We have a channel wise doc on templates. Check them
out below 👇
* [SMS Template](/sms/sms-template)
* [Email Template](/email/email-template)
* [Push Template](/push/push-template)
* [WhatsApp Template](/whatsapp/whatsapp-template)
* [Voice Template](/voice/voice-template)
* [Slack Template](/chat/slack/slack-template)
**Dynamic Fields**
Our channel wise template docs above cover this in more detail. In brief, you
can pass dynamic or custom data in the templates like Invoice ID, user name,
tracking link etc by specifying them within handlebars `{{ user_name }}`. Raven
uses [Handlebars.js](https://handlebarsjs.com/guide/#what-is-handlebars) to
parse the template and all handlebar operations are supported like nested
objects, #if, #each etc. You will need to pass the value of the variables in the
`data` object of [Send Event API](/api-reference/send-event).
### Step 4. Test
Once everything is configured, its status is changed from DRAFT to LIVE. You can
now use the Send Event API to test, by sending an event with the configured
event name. You can also trigger the Event from the dashboard. Go to Event
List > Send Event (Airplane Icon).